


Do you love photography, but found that life sometimes just… gets in the way? You’re busy, distracted, and suddenly weeks go by without touching your camera? Plus, when you do take photos, you’re not even sure who to share them with?
We get it 😅
That’s exactly why we’re starting photo assignments: sometimes you just need a little incentive to actually pick up your camera. Not a huge project, not a months-long challenge—just something light that gets you creating again.
And here we are: Assignment 1

Since announcing this idea a few weeks ago, we’ve had so many positive replies, and honestly, that buzz has us so hyped.
So when we thought about how to kick this off, we asked ourselves: should we go big? Pick a bold theme? Dive into technical skills right away? Or provide some free editing assets?
But then it hit us: before anything else, it’s way more fun to begin with a kind of visual introduction round. Like a first hello—but in a visual, photo form.
Here’s what you’ll find in today’s post:
✨ The assignment itself
✨ Why we’re starting here (and not with something “technical”)
✨ Creative guidance on composition
✨ How to upload your photo to the community gallery
Let’s jump in 👇
Your first photo assignment
This opening assignment is about you: about where you stand right now, what draws your eye, and the way you see the world through your camera. Think of it as your first handshake with the community—a single image that says, with confidence: this is me.
Deliverable: One photograph that introduces us to your photography style.
Theme: Composition.
Genre: Completely open. It can be a portrait, a street scene, a landscape, or even something abstract—whatever feels true to your vision.
Deadline: Upload your image to the community gallery within 7 days, by Friday, 10 October 2025. See the end of this post for details on how to submit your photo to the community gallery.
By participating, you agree to our Terms of Service and Privacy Statement.
Why this assignment?
This assignment is about more than just a single image. It’s about taking a moment to reflect on your own style, your interests, and the things that make your work yours.
By participating, you’ll:
Clarify your style: What genres, techniques, lighting, and colours do you gravitate towards? This is your chance to notice what makes your work uniquely yours.
Learn about composition: Notice how you naturally frame a scene and start to recognise composition techniques in your own photos (and in others’).
Connect in the community gallery: See how others approached the same assignment. Some images will surprise you, others might feel close to your own way of seeing. Either way, it’s a place to notice, get inspired, and maybe start a conversation.
Creative Guidance: The Art of Intentional Composition
For this first assignment, our creative guidance starts with composition: a fundamental principle across all visual arts, including photography.
Composition is the arrangement of elements within a photograph. It determines how the subject is presented, how the viewer’s eye moves through the frame, and how the image communicates its message. Every choice (e.g. where to place a subject, how to use light, how much space to include) shapes the photograph’s story.

While there are common principles that have guided photographers for centuries, composition is not about following fixed rules. It is about making deliberate decisions that bring order, balance, and meaning to the scene. A well-composed image directs attention, creates harmony, and allows the photographer’s vision to come through.
In this first creative guidance, we will look at ten commonly used techniques of composition.
1. Framing
Framing means using elements inside the scene to surround or highlight your subject. This can be a window or doorway (a frame within a frame), objects in the foreground that add depth, or even light and shadow creating a natural border. A good frame focuses attention and makes the subject stand out more clearly.


2. Rule of Thirds
Imagine dividing your frame into a 3x3 grid. Placing important elements along the lines or at the intersections often creates balance in the photo. It’s one of the simplest ways to avoid a static, centered composition and to guide the viewer’s eye through the frame.


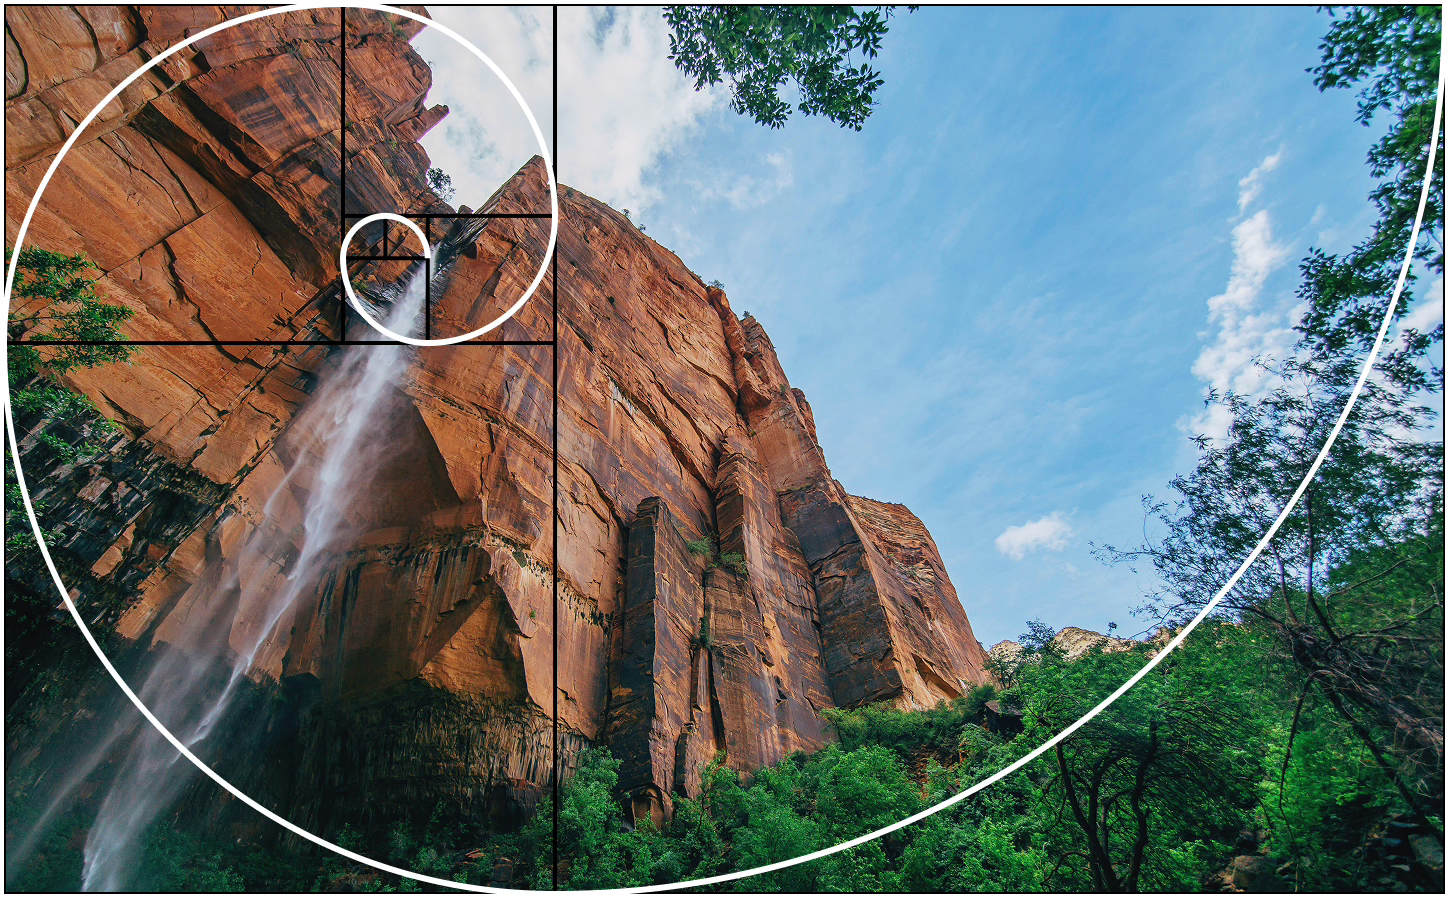
3. Golden Ratio
The golden ratio is a more subtle alternative to the rule of thirds. It’s often shown as a spiral that guides the eye through the frame in a way that feels organic and balanced. Placing your subject along this curve can create harmony that feels natural.
4. Central Composition
Central position is a composition technique where the main subject is placed in the middle of the frame. This placement makes it immediately clear what the photograph is about, giving the subject visual priority. It works best when there is a single subject and the surroundings are simple, symmetrical, or otherwise support the center. Using central position can create a sense of stability, balance, and focus, making the image easy for the viewer to understand.


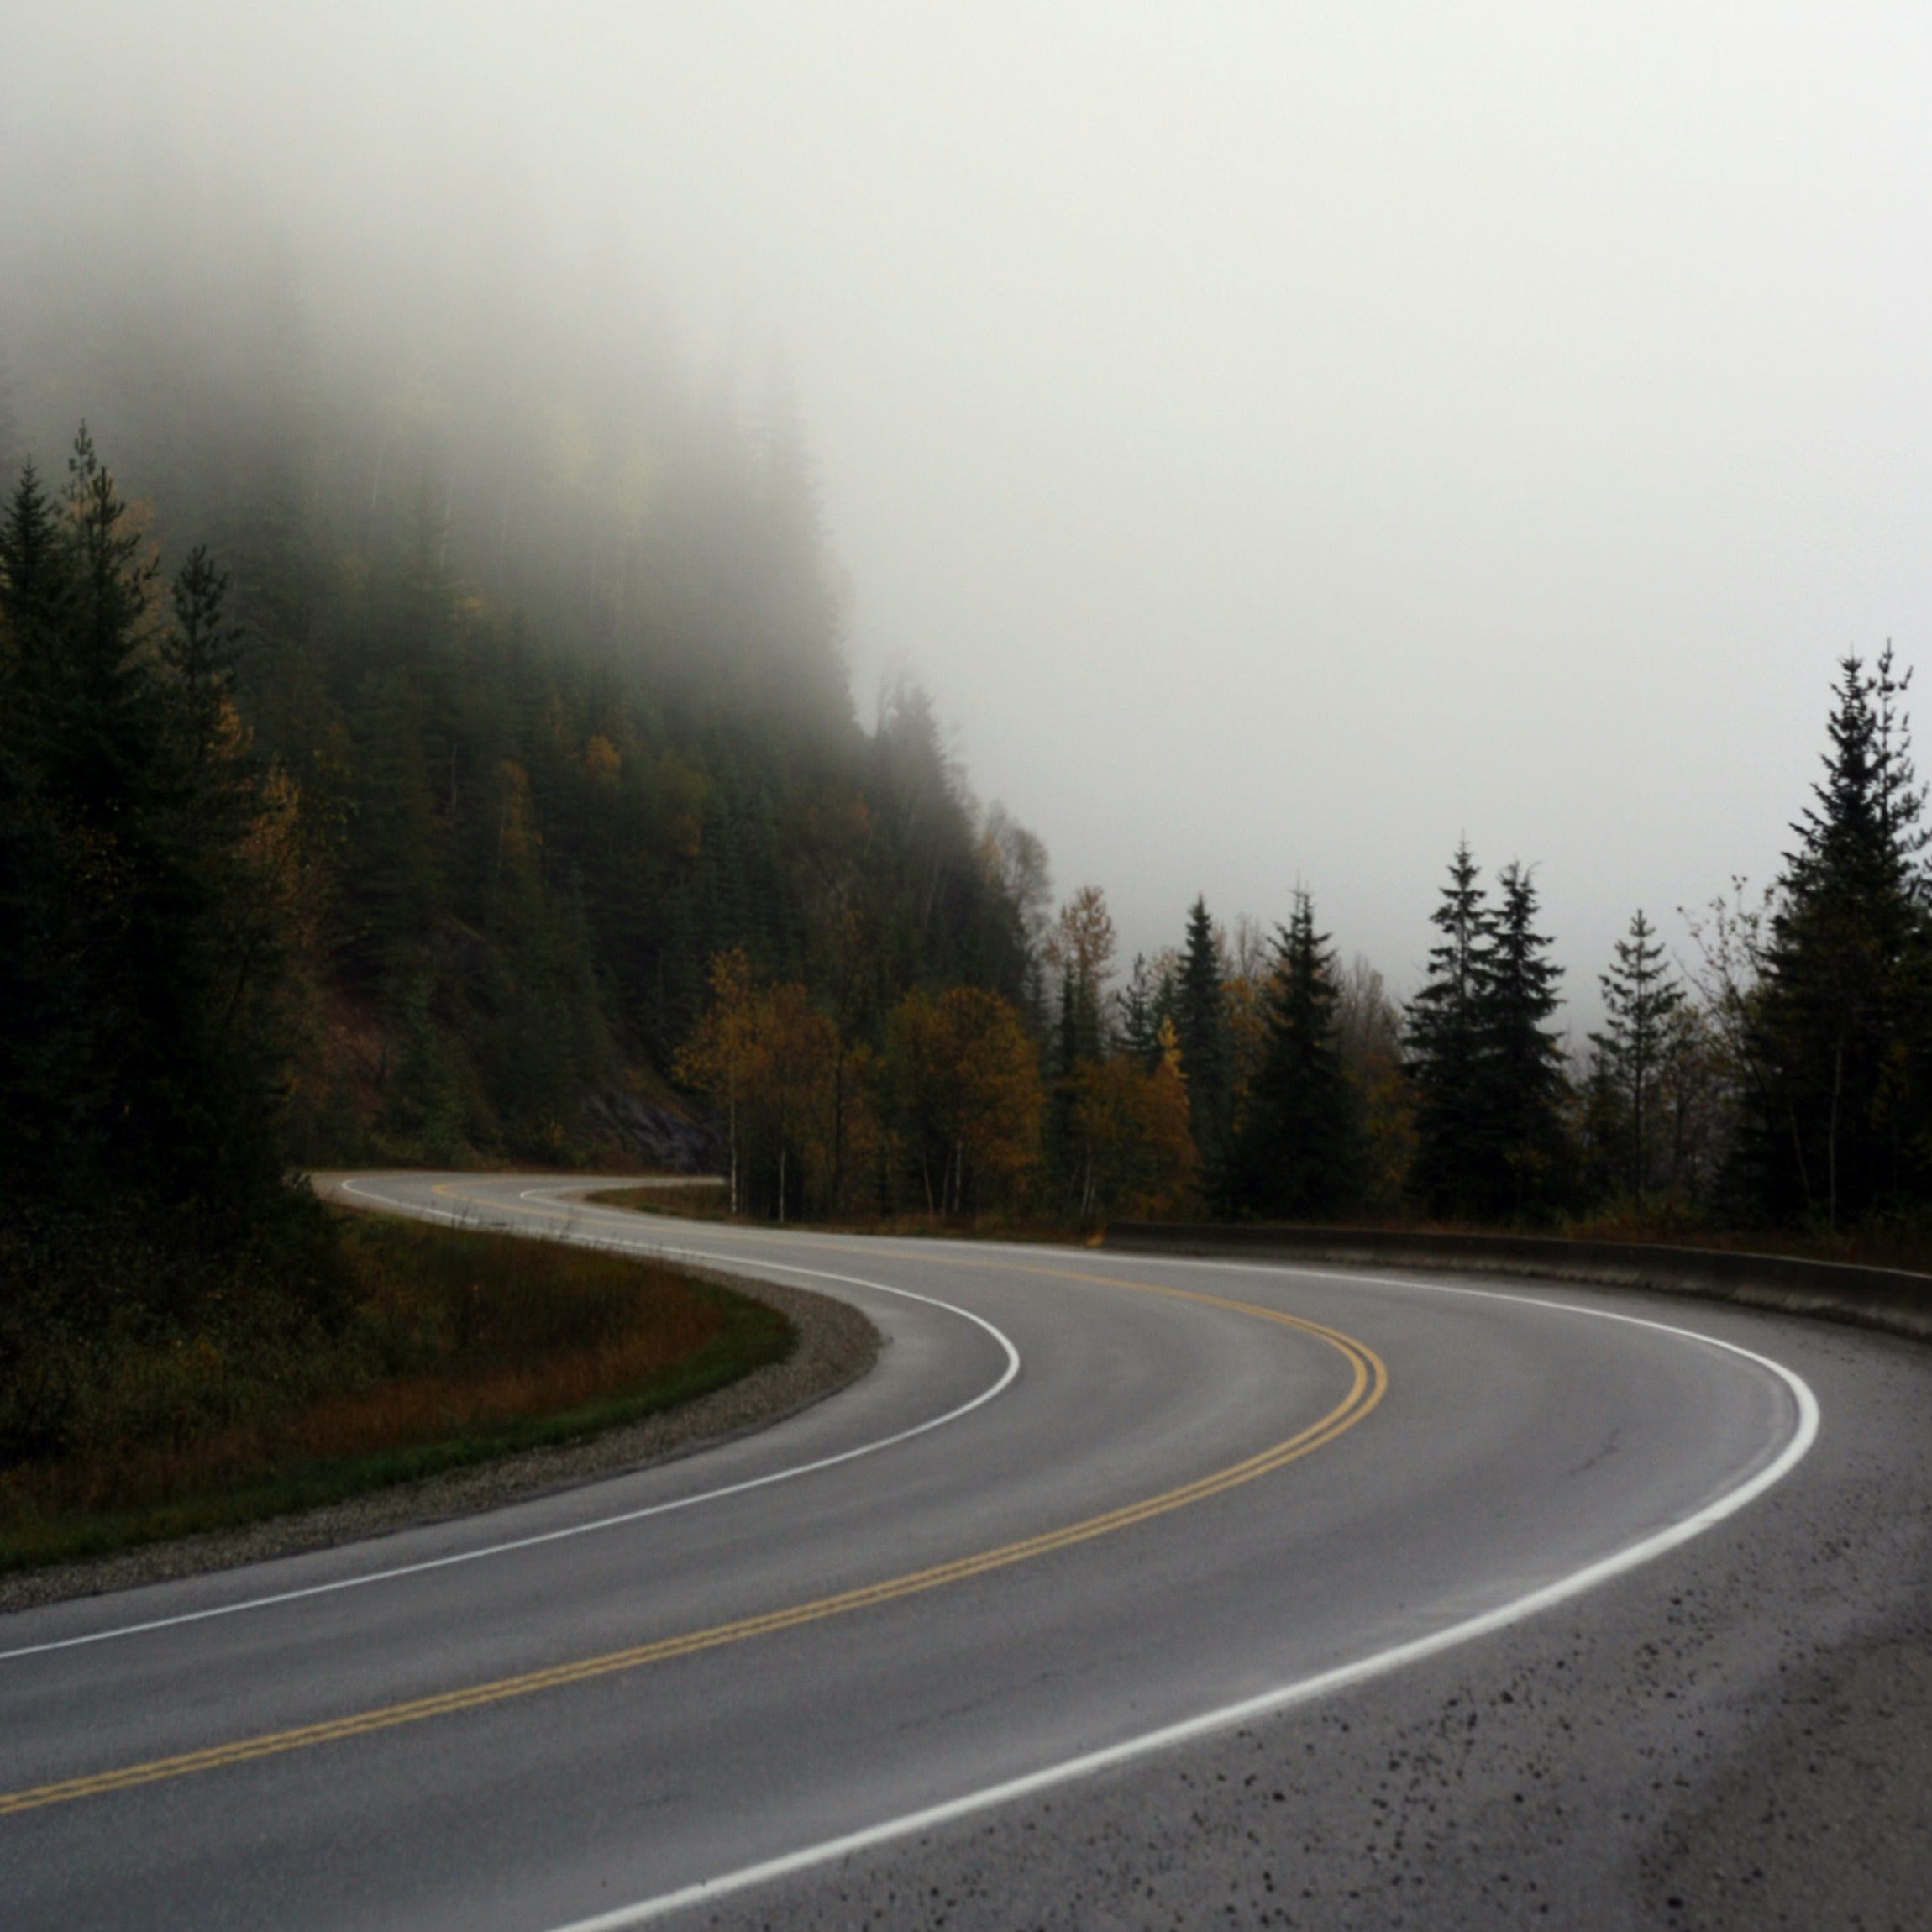
5. Lines
Lines in photography guide the viewer’s eye through the image and can create depth, movement, or emphasis. They can be horizontal or vertical lines, leading lines that point toward the subject, diagonals that add dynamism, or curves that create a flowing, natural path for the eye.
Recognise horizontal lines and vertical lines. They can add strength and stability.


Leading lines (e.g. roads, fences, rivers) pull the eye into the frame.

Diagonals create energy and movement.

Curved lines (e.g. S-curves) create a natural, flowing path for the eye.
6. Symmetry
Symmetry creates balance. A perfectly mirrored scene (whether in architecture, reflections, or nature) feels satisfying and deliberate. It draws the viewer’s eye to the center and conveys a sense of stability.


7. Negative Space
Negative space gives your subject room to breathe. By surrounding a subject with openness, you draw attention to what remains and create a sense of simplicity or calm.

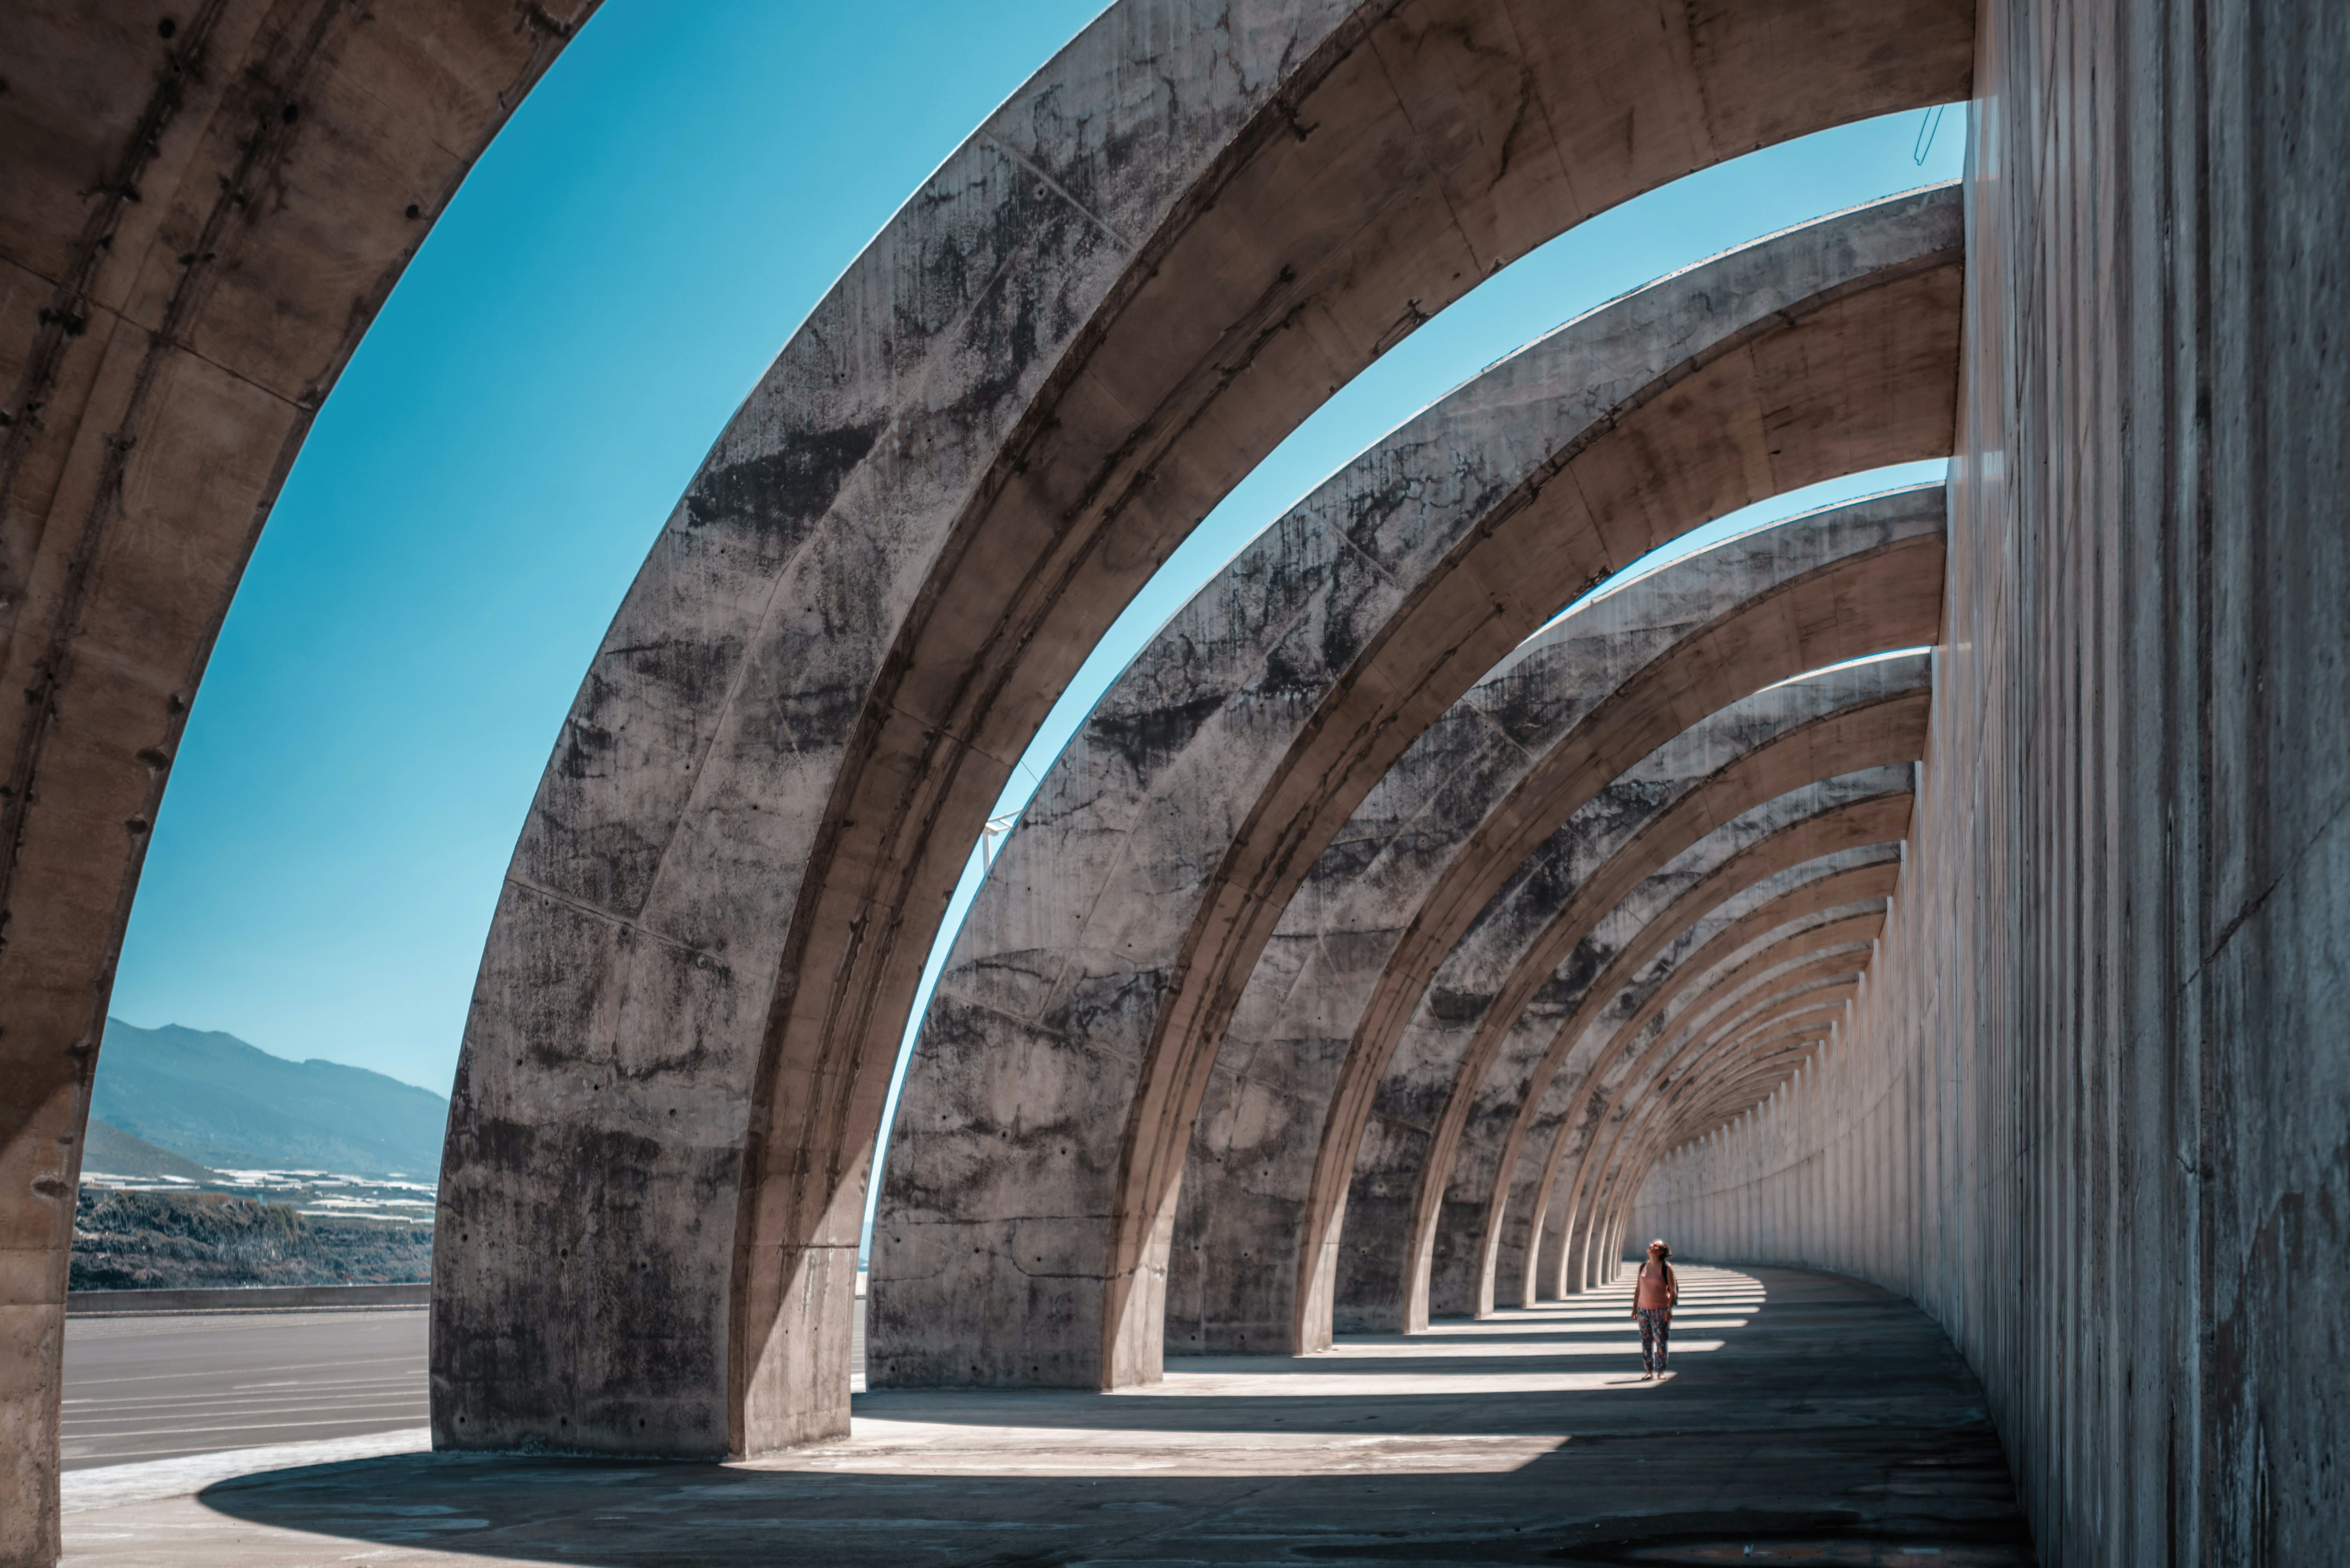
8. Scale
Scale is all about relationships. By playing with size comparisons, you give the viewer a sense of proportion. Use people, objects, or architecture as reference points to show just how big or small your subject really is.

9. Contrast
Contrast is about difference. It’s what makes elements stand out from one another.
Unlike other composition techniques, contrast is not about placement, but about making distinctions visible so the viewer immediately notices the important relationships in the image.
Tonal contrast (light vs. dark elements) can create depth, drama, or focus on a particular area.

Colour contrast (complementary or opposing hues) can make a subject pop against its surroundings or create emotional tension.
Conceptual contrast (such as placing opposing or unexpected ideas, objects, or emotions together) gives the viewer something to compare or question, adding interest beyond what is literally in the frame.

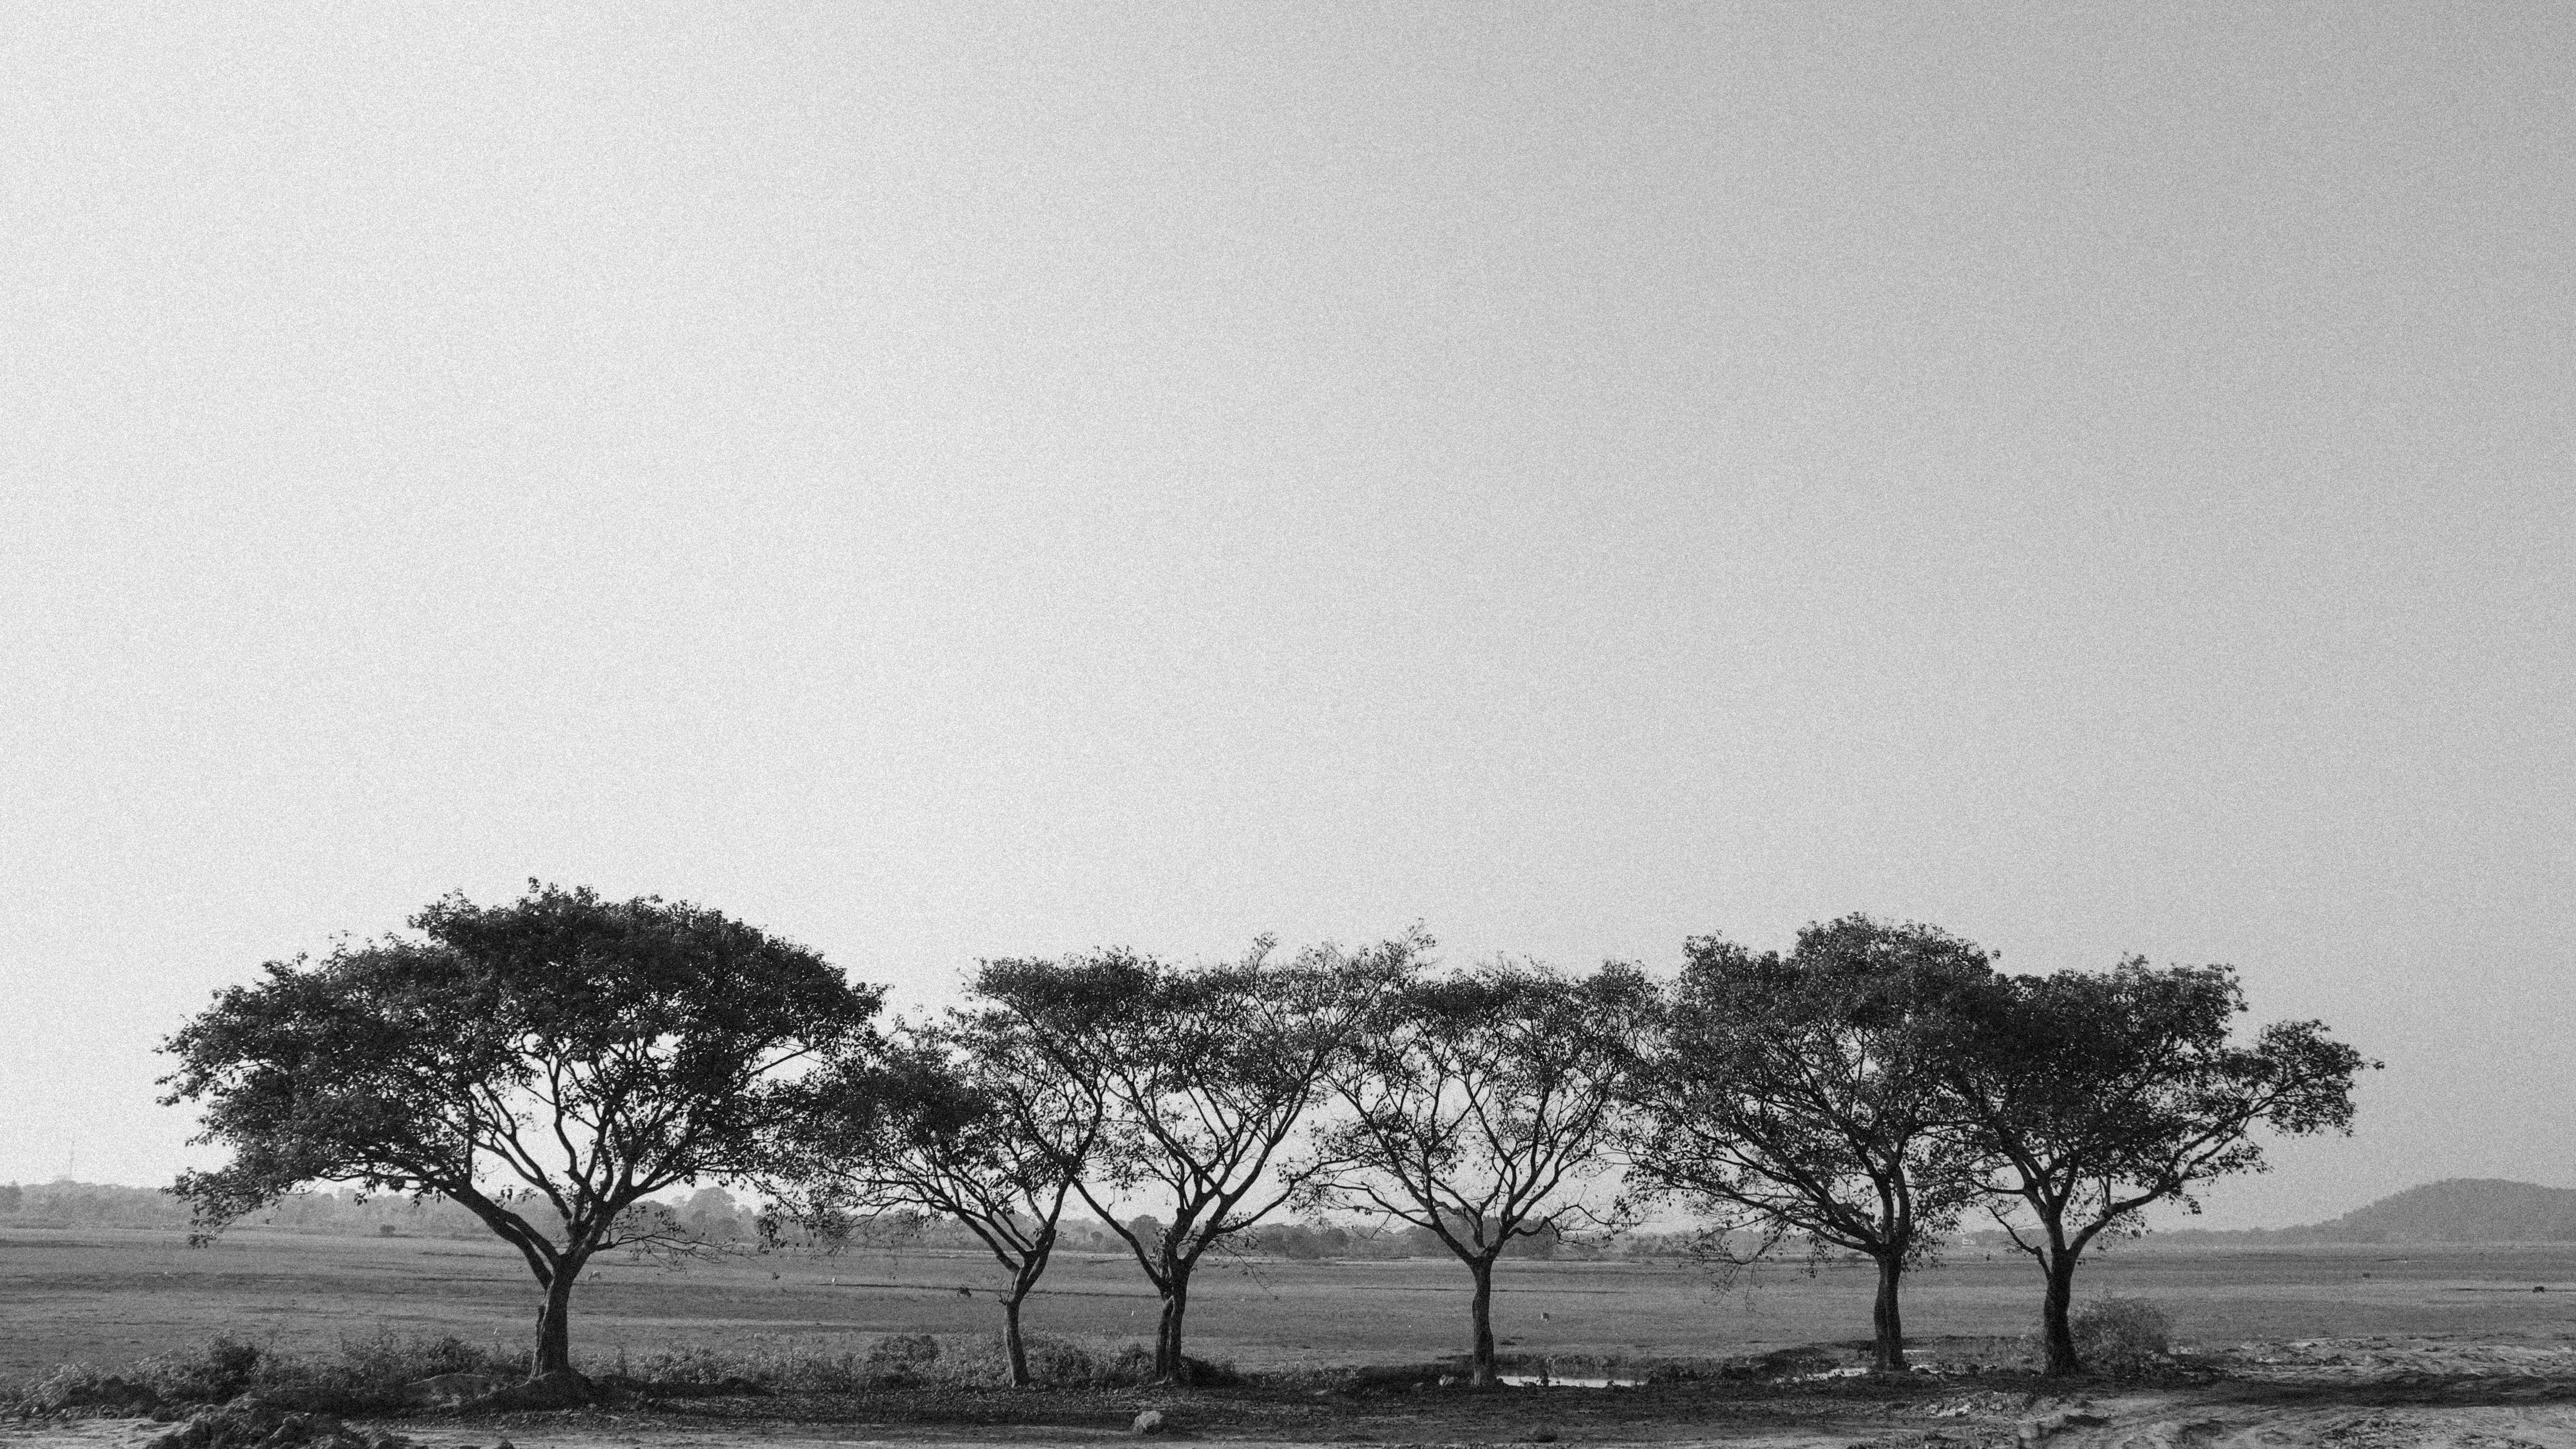
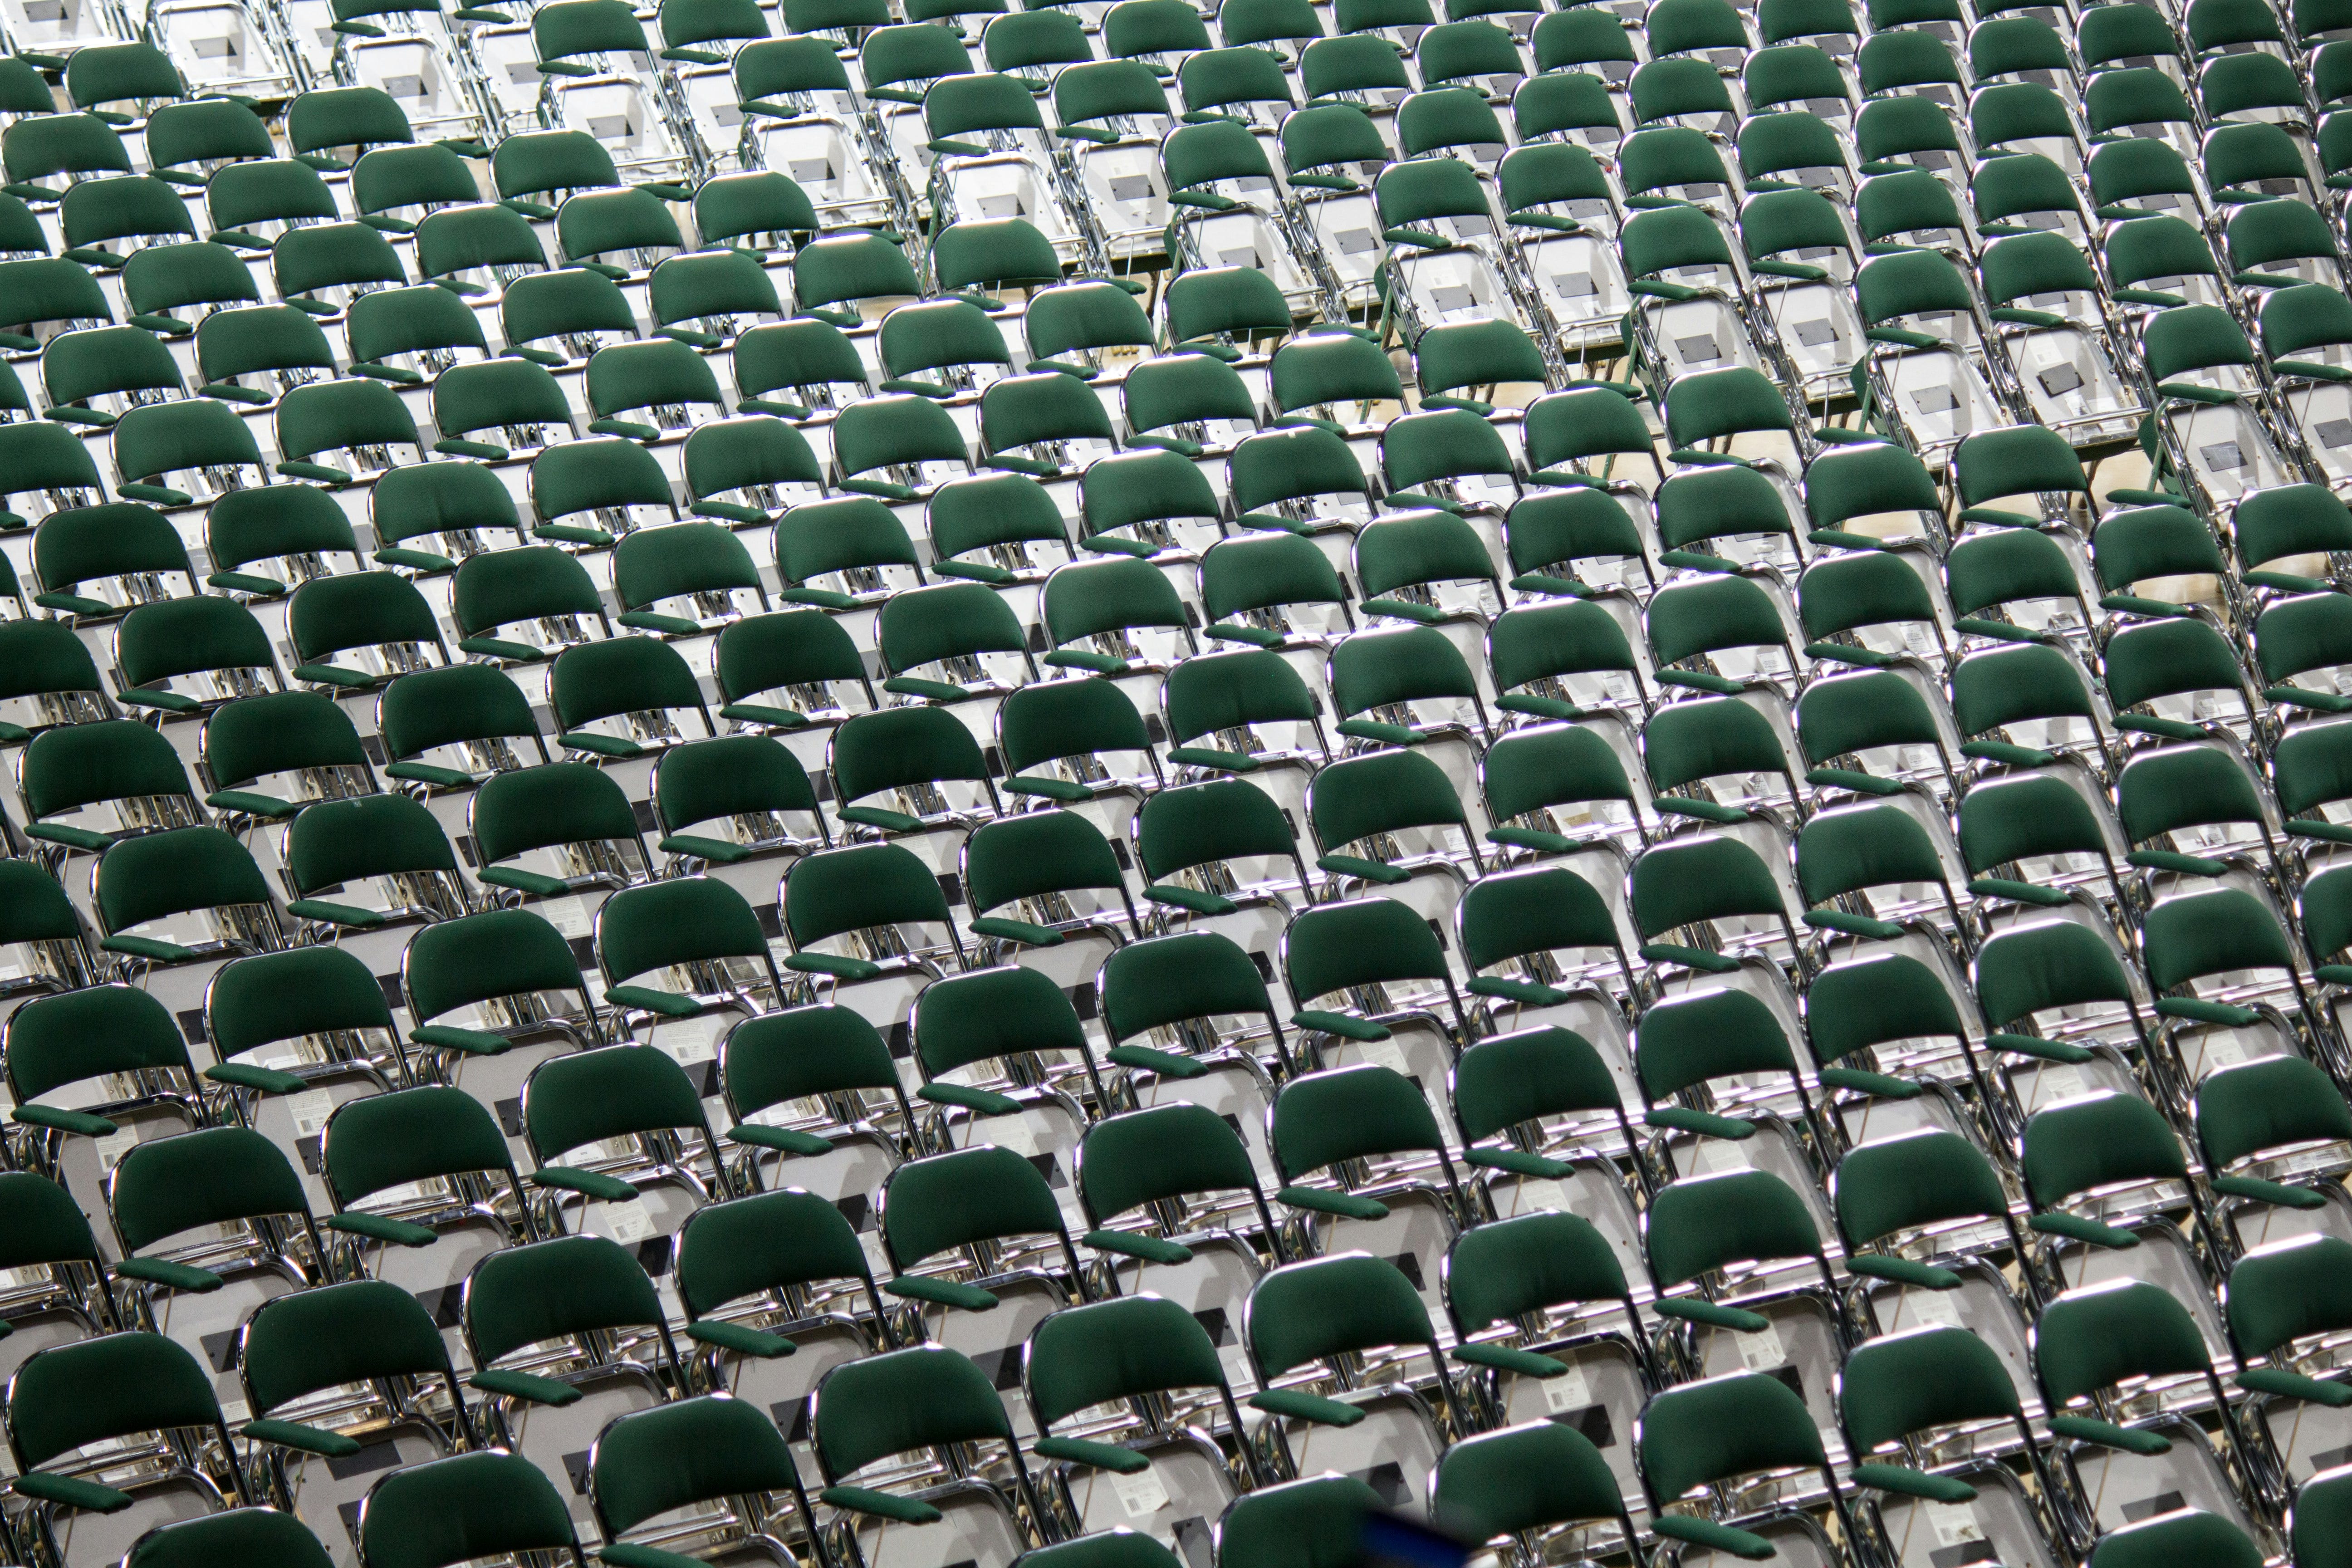
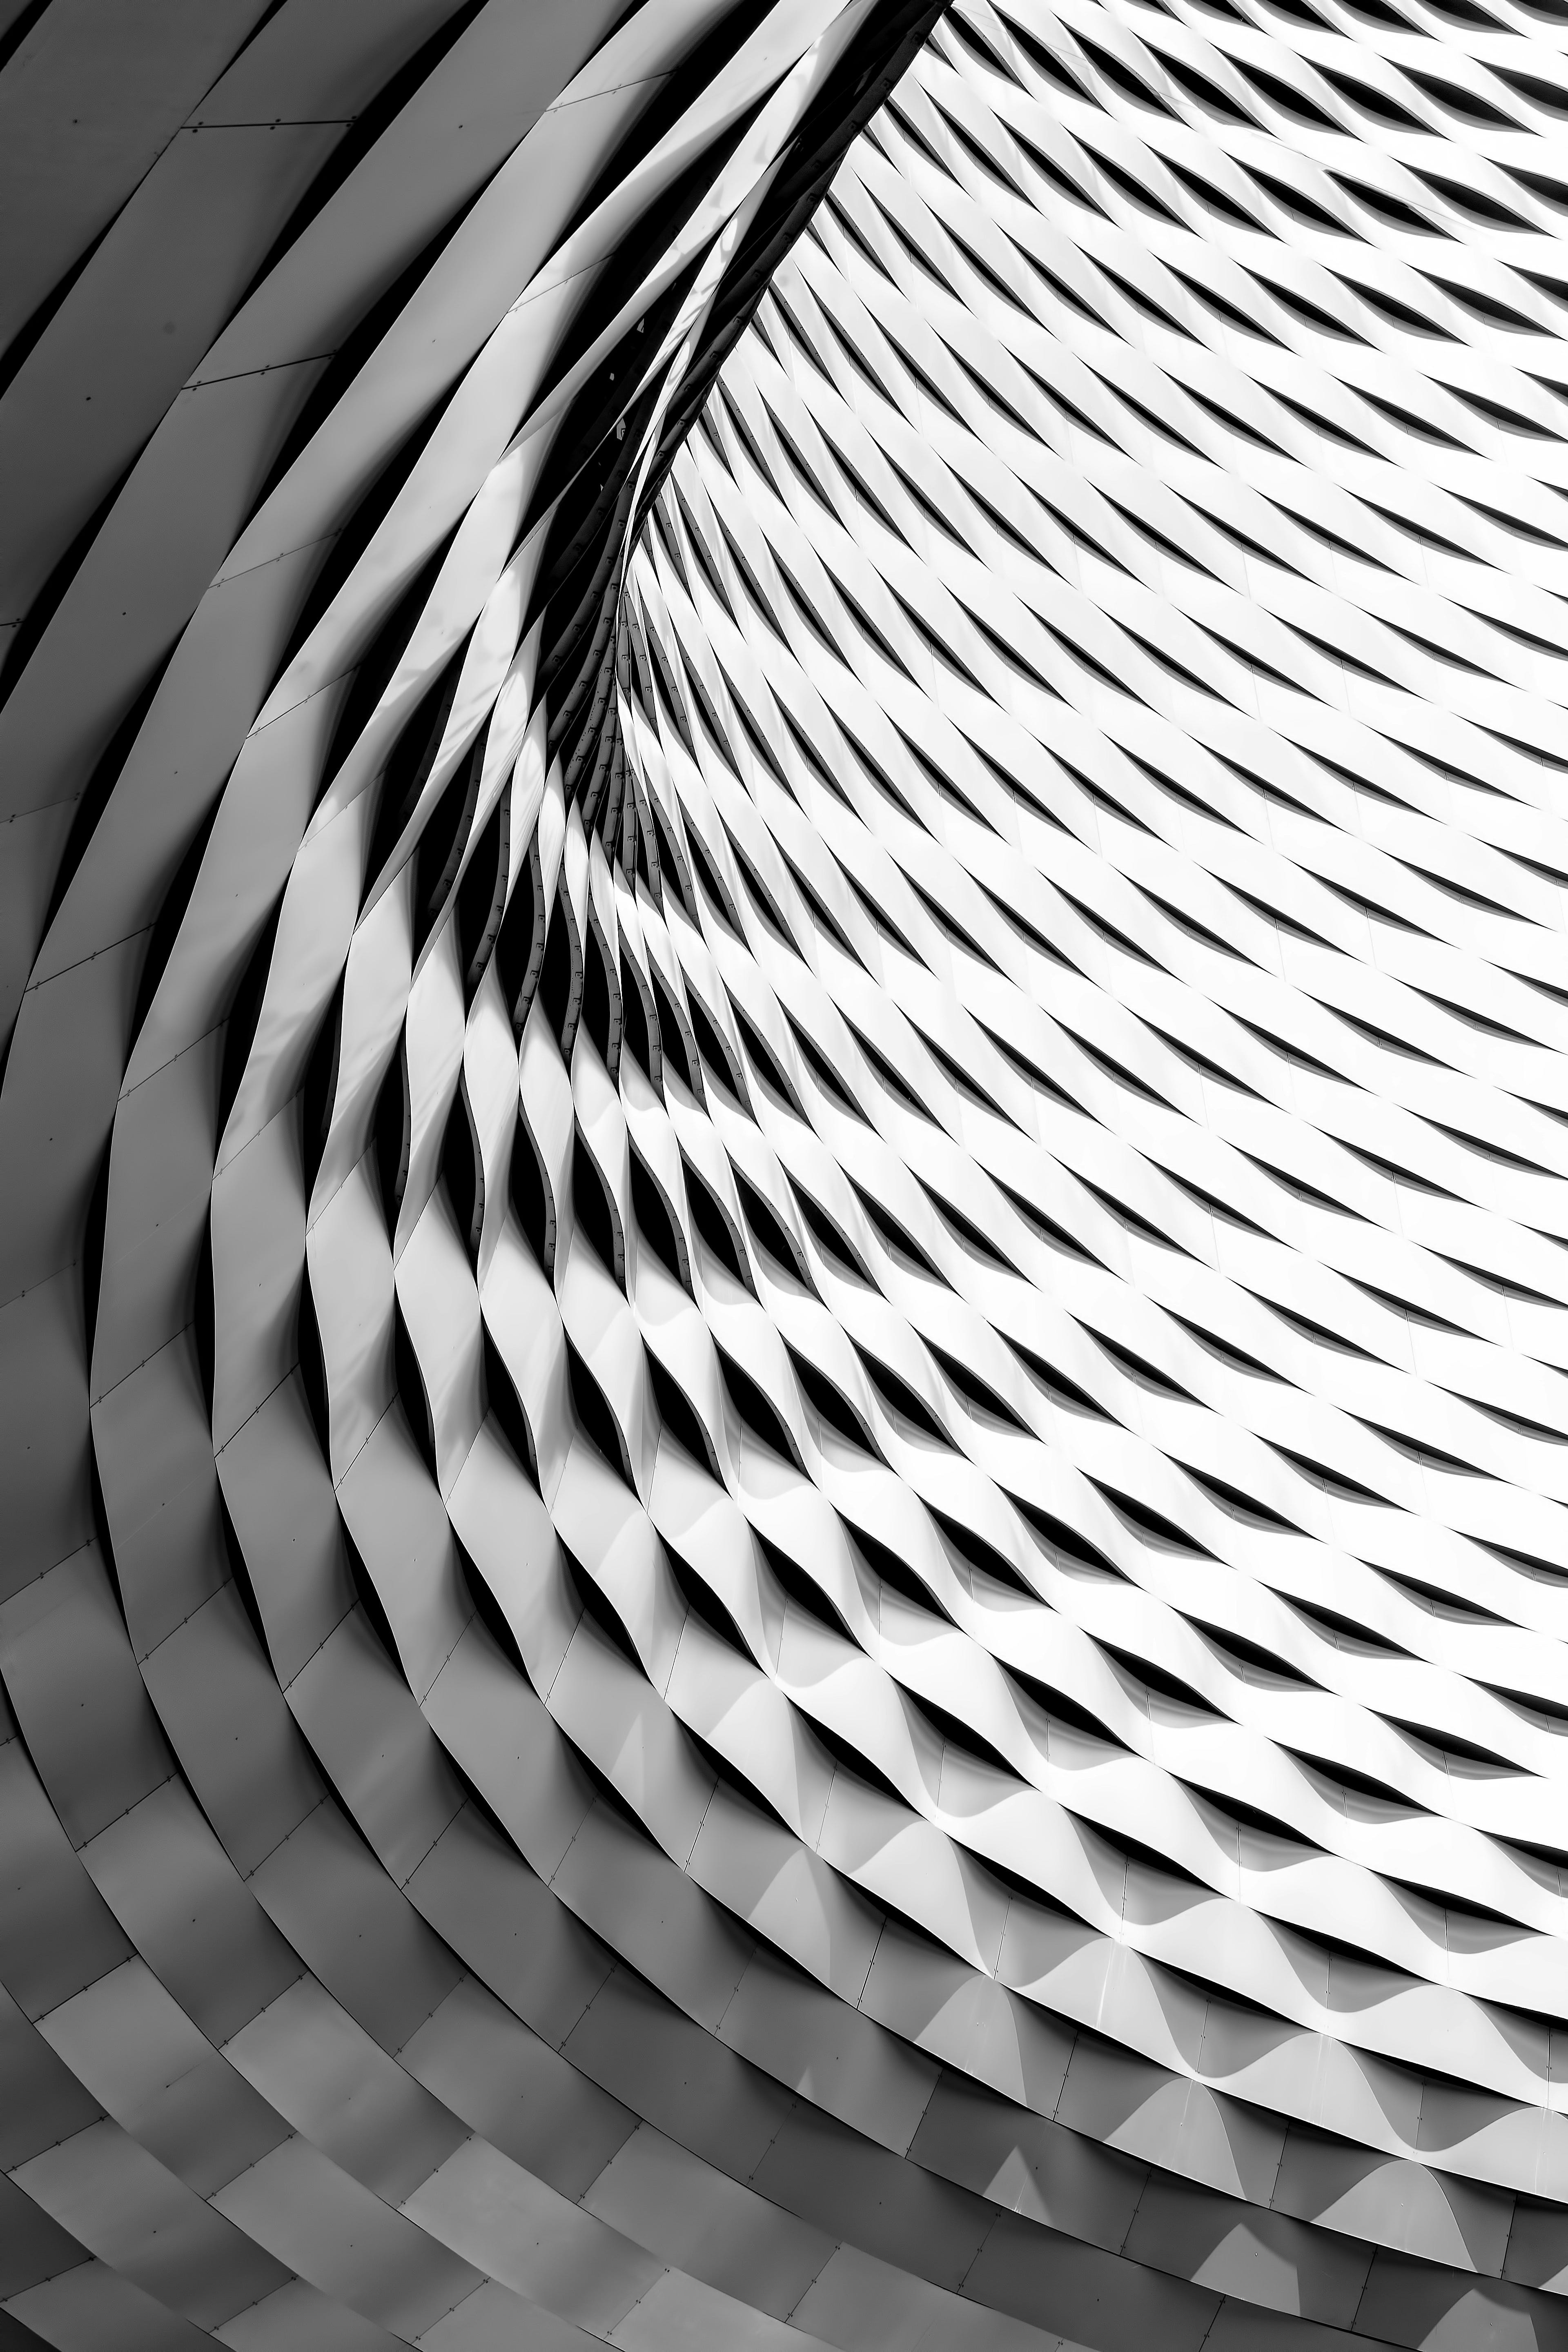
10. Patterns
Patterns guide the viewer’s eye through the frame, creating a sense of harmony and flow. They can make an image feel dynamic and structured. Use patterns to draw attention to your subject or to create a sense of depth and perspective.
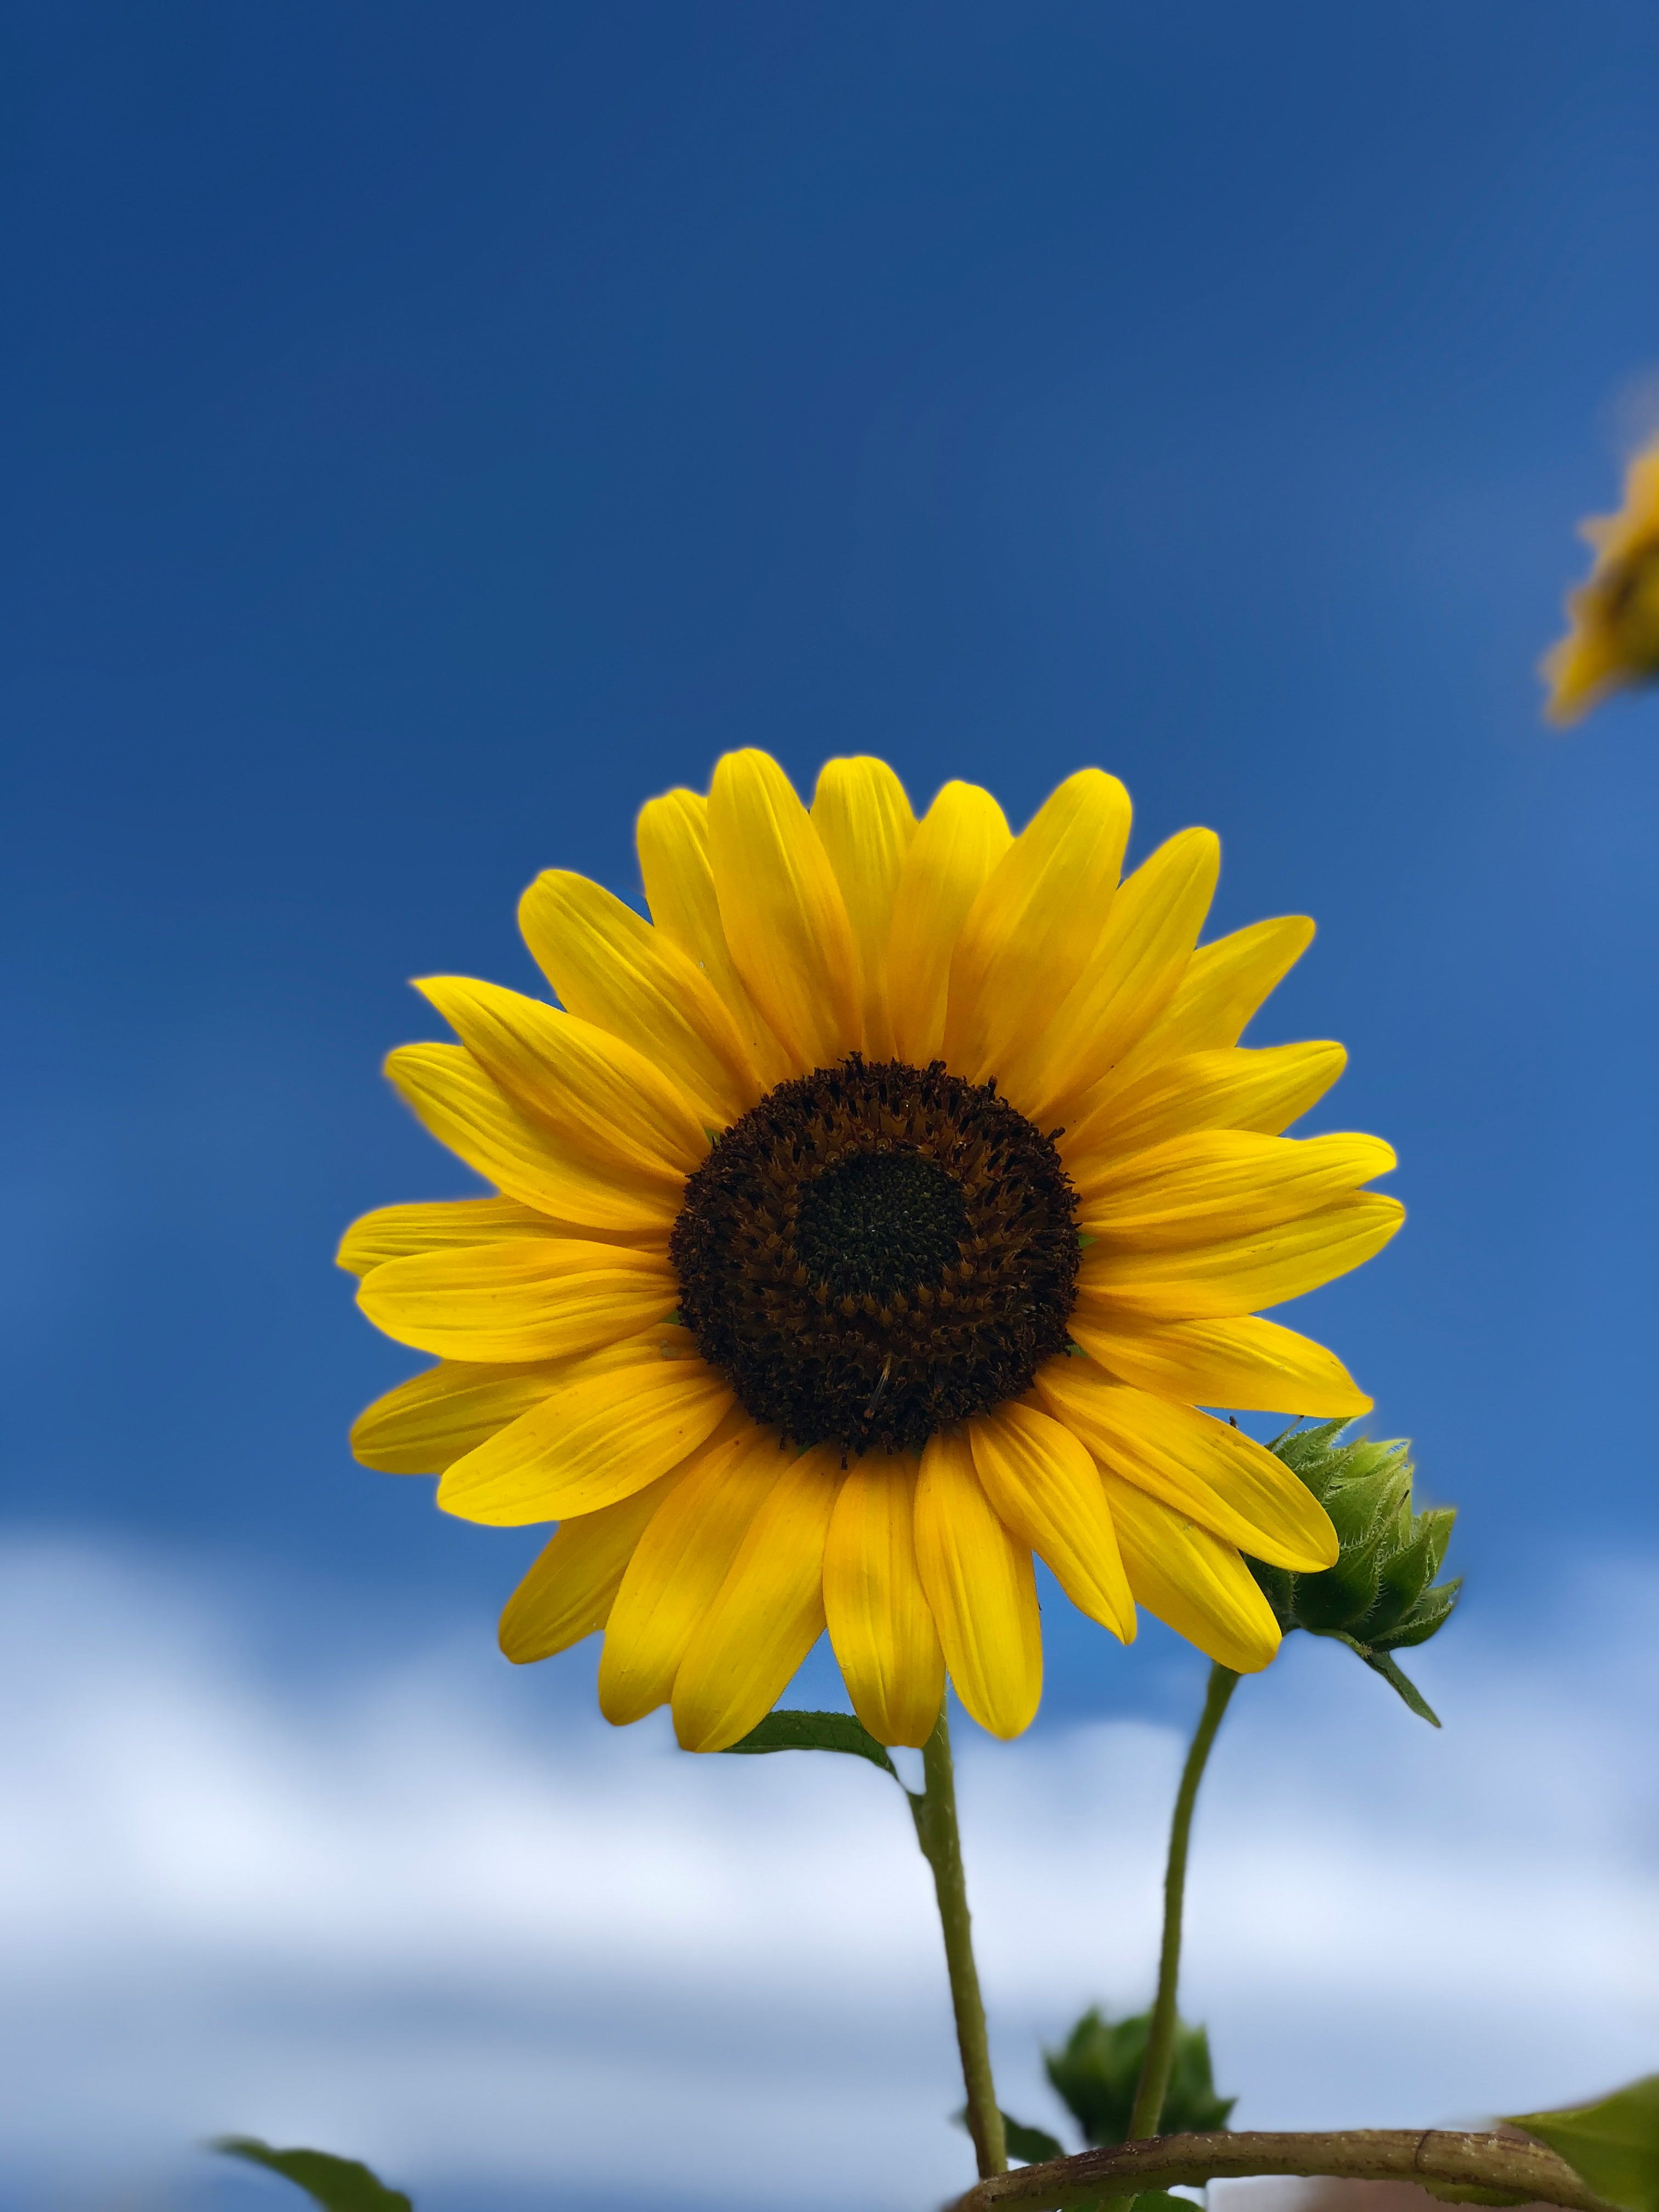
Breaking a pattern intentionally (such as a single red leaf among green ones), can create a powerful focal point. This disruption adds intrigue and draws the viewer’s eye to what matters most in your image.

Bringing It All Together for Your Assignment
Your photographic introduction is your chance to show the world your style. Here’s a workflow:
Start with your story: What do you want your photo to say? Define your subject, think about your background, maybe add something in the foreground, and use a style that excites you.
Remember the techniques: Use (or combine!) composition techniques to structure your frame—or set them aside entirely if your vision calls for it.
Build your frame: Combine individual and relational elements for harmony.
Experiment: Move around, reposition and try different angles & perspectives (e.g. lower perspective instead of eye-level). This will change your composition.
Refine: Ask: Does every element add to the story? Remove distractions, or give these ‘distracting’ elements a compelling reason to be there.
How to submit
We host the community gallery via Padlet. You’ll need a (free) Padlet account to submit your photo.
Click the button ‘Submit photo’ below.
Log in with (or create) a free Padlet account.
Upload your image, add your name & social handle (so we can tag you!), and include a short caption if you want.
Hit publish and you’re in! 🎉
By participating, you agree to our Terms of Service and Privacy Statement.
If you have any questions, ideas or just want to say hi → hello@camerasetup.co
We can’t wait to meet you—visually.
Best,
The Camera Setup Team
Let us know what you think! 🙌
Hello friend, Ive been on Substack for about a week, and im trying to connect with interesting people, so I thought I’d comment!
I write about history, with a philosophical touch.
My latest work -
https://open.substack.com/pub/jordannuttall/p/historic-forged-photos?r=4f55i2&utm_medium=ios